Maybelline Color Show Acid Wash Effect in Ripped-Tide

I apologise for the long title! The name of this little gorgeous polish is just this long..

I also usually strive to upload my post in chronological order, and never compromising on quality with ‘just getting a post out’, but I just wanted to show this little beauty to you πŸ™‚

10578519_10154583971880262_375579301_o

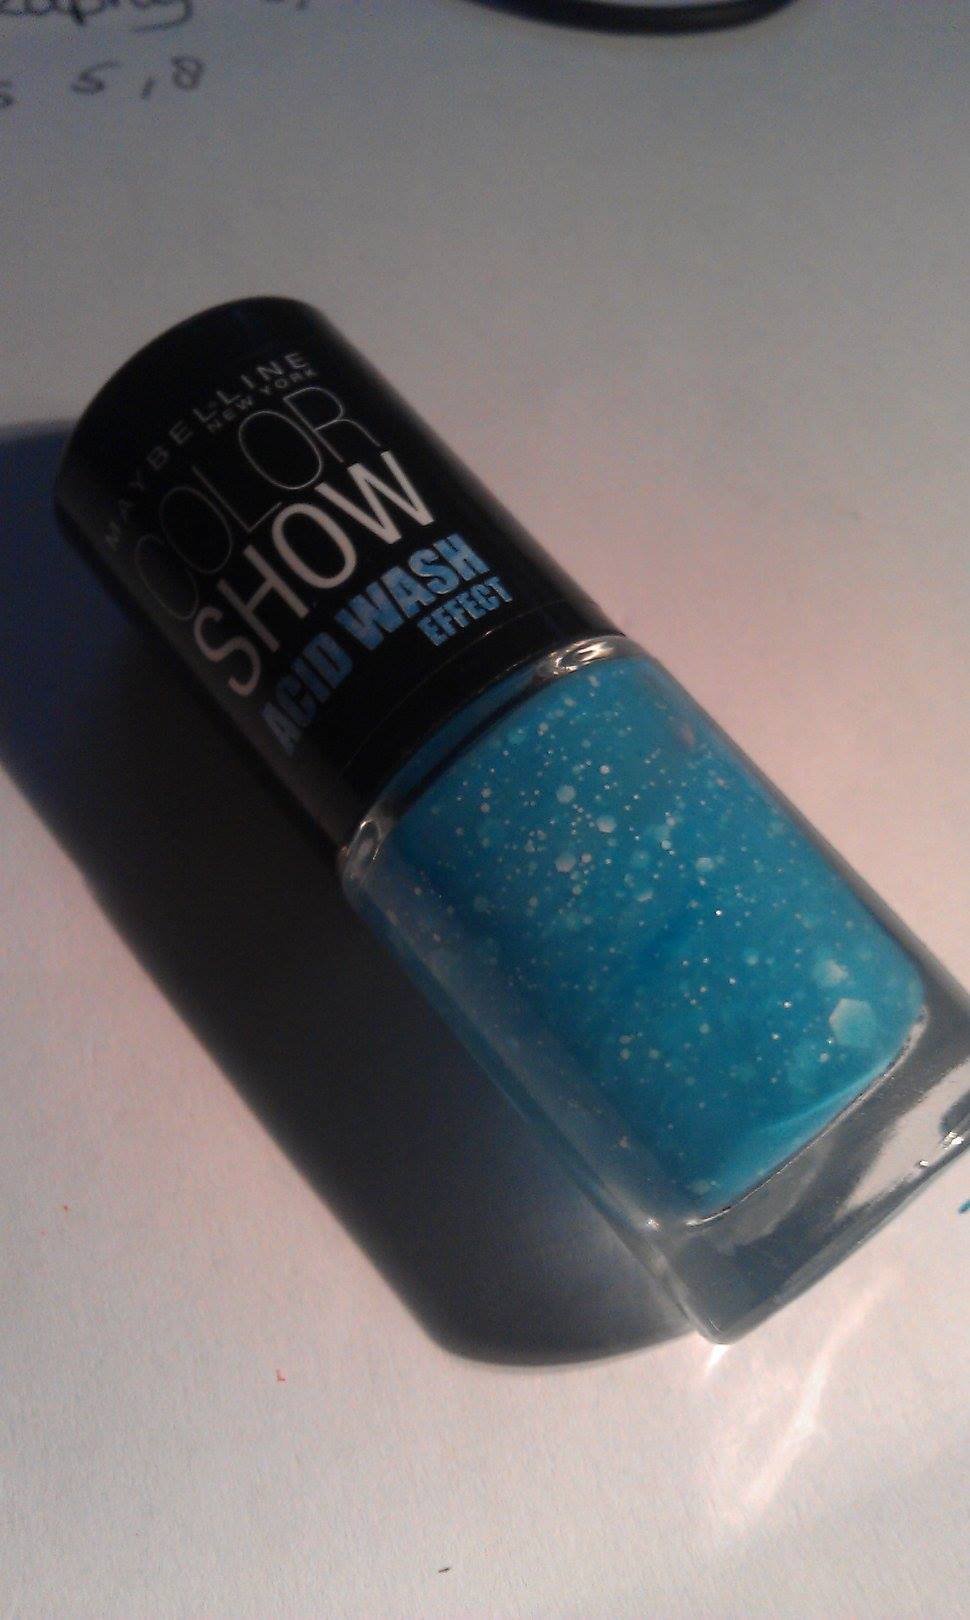
I bought this bottle at bol.com for €3.99, because I had some coupons to spend (also bought nail strengthener, nail polish remover, a top coat, a brightening concealer, and a mattifying compact powder; might do some reviews on those things!) and its name is Ripped-Tide (247). It’s a cute bright blue jelly-like polish, with white ‘glitters’ in all sizes! I can distinguish 5 or 6 different sizes, with the largest glitters being about 2 millimeters in size!

10676684_10154583973485262_536787658_o10709750_10154583973270262_1054820875_o10707771_10154583973000262_1846169278_o

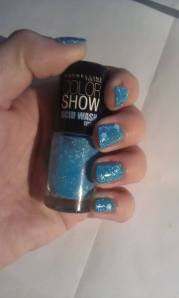
The blue formula is very sheer though; I needed three coats to get some kind of opacity (and it wasn’t even fully opaque), but that was fine actually. It dried quick, and isn’t as bumpy as I’d expected it to be. Even the larger glitters lie relatively flat, and are easily evened out with a top coat. The sheer formula of the polish makes for a great layered-glitters-effect, I’m really loving it! I do suggest wearing it over a white or blue Β though, so the colours pop some more πŸ™‚

I can’t really comment on the wear time, I can’t even wear it for a full day but my nails are really terrible. I used a coat of the new strengthener, and the new top coat, but still I had massive chips and could peel off large chunks of the polish. But even with a base coat, some of the glitters stuck stubbornly to my nails!

To conclude, I’m quite happy with my purchase! It has a very unique look to it, and if this bright blue isn’t really your thing, they’ve got some other shades too, including a white glitter topper!

Ebay haul #2

It’s been exactly a week since my first Ebay article went up, and I allowed myself to get some new things from Ebay!! Some things I needed, some things I wanted πŸ˜‰

1. Penguin USB stick

I think this might be the first auction item I ‘won’! I needed a USB stick (this one is 8GB) and I’m obsessed with penguins ❀ For only $4.31, I kind of wanted this! Shame you have to rip off his head to get to the drive, and there’s a little chain attached to the drive; to make sure you don’t lose the cap but just the drive! Very useful.. /sarcasm

It’s still adorable though ❀ And it arrived already! πŸ˜€

2. Nail art brushes

I love painting, and I love nail art! I’m not sure what I’m going to use these brushes for (they probably work great for detail painting too) but at just over 3 dollars for 15 brushes? Just HAD to have them!

3. Glass nail files

I haven’t particularly cared about my nails before, but they do peel and chip a lot. I previously used a metal or cardboard file, but everyone in the nail world seems to recommend glass ones, so of course I got searching πŸ˜‰ There are ones for a dollar on Ebay, but I thought getting more might get me a better deal, like these 4 for only $1.76 πŸ™‚ They arrived very quickly, and were all individually packaged. They didn’t come in a bubble wrap envelope, but they did survive the journey πŸ™‚

4. Ear plugs

Since I’m going to a festival this summer, I wanted to try out some cheap ear plugs. They probably don’t do a good job at isolating sound, but hopefully I’ll get them on time so I can test them! They also came with a nose clip for swimming, which might come in handy; I can’t swim under water without pinching my nose closed!! I think it’d look way too silly though..

5. Earphones

Tangled earphones, AUGH! I have to deal with tangled cords nearly every day. I hope to eliminate a little bit of that frustration by these earphones! I had seen them several times before but for around 10 euros. For just over 4 dollars, I kind of needed to buy this..

6. Replacement in-ear earbud thingies

I really did NEED these! I always lose them, and in-ear phones aren’t as comfy without πŸ˜› For a dollar you get a bunch of 10 so it’ll hopefully be a while before I run out

7. Stamping plates


Did I mention I love penguins? When I saw the penguin stamping plate, I got kind of crazy. HOW ADORABLE! The other plate has some cute patterns that I will hopefully use a lot πŸ™‚ I only have two stamping plates now so I could kind of justify getting two more πŸ˜‰ I really got my eyes on some MoYou plates though. Isn’t this pretty? Their plates don’t just feature separate patterns and images, but one big design with lots of patterns and things! ❀


I’ll keep track of all shipping times, and add a table once I got everything!

Wedding guest outfit

A few weeks ago, my cousin got married to her boyfriend of 5 years! Even though I’m not very much of a girly-girl, weddings always make me very excited! Of course I love the happy people, the beautiful bride and groom, the gorgeous cake (did I mention I love cake? :D), the incredible food, the great atmosphere, seeing family again.. And being able to go all out on a cute outfit, matching nail art and awesome make up! I went shopping with my mom for a summery dress, because most of the wedding would be outside. I originally wanted to go for something in a pastel shade, but the yellow-white striped version of this dress just wasn’t as gorgeous as the one with dark blue stripes!
dress_03

We visited quite a lot of shops, but in the Zara they had a billion of adorable dresses! I picked up this beauty for about 28 euros, so I guess this would fit most budgets! I’m also not a very skinny person, but this dress made me look quite fabulous! The body is quite tight, but riiight where my belly starts, the dress flares out πŸ™‚ I haven’t made any pics with the dress on, but this is what it looks like on the hanger:

dress_01

Isn’t it pretty?! I’m still in love with it!

Since we were invited for the wedding all day, I didn’t think wearing heels would be a good idea. I did have some bright red Vans, which I initially wanted to wear, or my mom’s pastel yellow ones. Both wouldn’t be a very good match for this dress, so we went into the Van Haren (Dutch budget shoe shop) and these great fake Vans were pretty much screaming at me!

dress_04 dress_05

Just look at how the insoles match the pattern and colours of my dress!! Plus, they were only about 10 euros, and very comfortable, so I just HAD to get them.

On my nails I decided to go with a white to dark blue gradient. Luckily, the dark blue Catrice polish from my recent blog sale haul was the exact right blue shade. Unfortunately, I think I forgot to take proper pictures (if I find them, I’ll add them of course!) so you’ll have to do with this snapshot I took with my phone:

10262639_10154014184985262_2090245221_o


I used Catrice Sing: Hey Dirty Lilah! as a base coat, since it was the lightest shade of polish I owned at that moment. I then sponged on the LE White and Seek and Be Indiglow!

Unfortunately, I didn’t take ANY pics of my eye/face look, since I was kind of hurried. I especially loved my eye look (which kind of got ruined due to a very emotional moment.. *sigh*). I made a bold black cat eye, with a bright blue eyeliner above that. I lined my lower lash line with two shades of blue eyeliner pencil (just subtly) and added a regular mascara. I also tightlined (like, drew on the upper waterline, if that makes sense) my eye with an intense black. Again, if I find pictures (or recreate the look) I’ll tell you! For the rest of my face I stole my mom’s bb cream and a translucent loose powder, and a rose/glittery lipstick. I don’t remember any of the brands unfortunately xD

And, I have another wedding tomorrow! Not sure what I’m going to wear yet, it’s only the evening party this time, so I’ll probably wear a less summery look. Might even go for heels if I dare!


DIY: Matte top coat

I’ve been expanding my nail polish collection for a while now (I just bought a massive amount of Catrice polishesΒ from mylittlepaperplane), but one thing that was seriously lacking, is a good matte top coat, or any matte polishes at all. I’ve been drooling over pictures of matte (mostly denim) polishes, and they just make a look so much classier!

Now, being the budget lover (and DIY lover) I am, I found this video on YouTube how to make your own matte top coat! I tried it, and it worked quite well! So, of course, I’ll share this with you too πŸ™‚
DIY_matte_02
What you need:

  • Clear nail polish
  • Corn starch
  • (paper) funnel
  • Spoon

DIY_matte_04 DIY_matte_03

And that’s really all!Β I didn’t even use a funnel because.. Well I forgot it xD I made a bit of a mess but nothing really bad.

How it works:

  1. Make sure your bottle is not completely full, otherwise there’s no room for the corn starch. I had a little bit of polish left in a bottle I spilled (over my pants..) and used it to test this DIY πŸ™‚
  2. Place the funnel over the polish bottle and put a bit of the corn starch in. There’s no exact amount of corn starch you need to add, just add, shake and test until you got something you like! I added quite a lot to a small amount of polish, so don’t be scared to put in a lot.
  3. Again, that’s it. Easy, isn’t it? Just remember to shake well. If your polish gets too thick, you can add some thinner or nail polish remover.

DIY_matte_05 DIY_matte_06


And this is my result! On the left is with the DIY top coat, on the left is the plain polish (no top coat). I used Catrice’s Petrolpolitan (no. 35) from the aforementioned haul πŸ˜€

DIY_matte_07 DIY_matte_08


So, what do you think about this DIY and/or matte polishes itself? I just *love* them πŸ™‚

Catrice mono eyeshadow – Don’t touch my Mosserati!

Since I started blogging and reading blogs on make up, fashion and nail polish, I can’t help but get as many stuff from the shops as my budget allows for (and more..). When I was at the drug store, I could fortunately limit myself to some face wash from Essence (which I will review if I’ve tested it a bit longer!), and this beautiful mono eye shadow from Catrice

Catrice_moss_01

It’s a gorgeous dark, mossy green (hence the name: Don’t touch my Mosserati) with a ton of sparkles! I usually tend to go for brighter shades, but a colour like this was seriously missing in my eye shadow collection.

Enough words, here are some more pictures of the swatch on my hand

Β Catrice_moss_02 Β Catrice_moss_04Β (the first pic is made with one light on the right, last one is with on-camera flash)

And on my eyes (because who else but beauty bloggers puts eyeshadow on their hands..)

Catrice_moss_08 Catrice_moss_06 Catrice_moss_05

I find it kinda hard taking good (and flattering) pics of my eyes, but I hope this shows the eye shadow well. I used a bright green on the center and inside part of my eye, and the Catrice eye shadow on the outer edge and in the crease. I used my Essence superfine eyeliner pen in deep black,Β and a drug store mascara (Etos X-tra black volume mascara waterproof) for the rest of the eye look.

Catrice’s mono eye shadow Don’t touch my Mosserati (#640) costed me €2.99 and is available at various drug stores (Netherlands: Kruidvat and Trekpleister)

Other bloggers thought this about Catrice: Don’t touch my Mosserati: